
Before and after
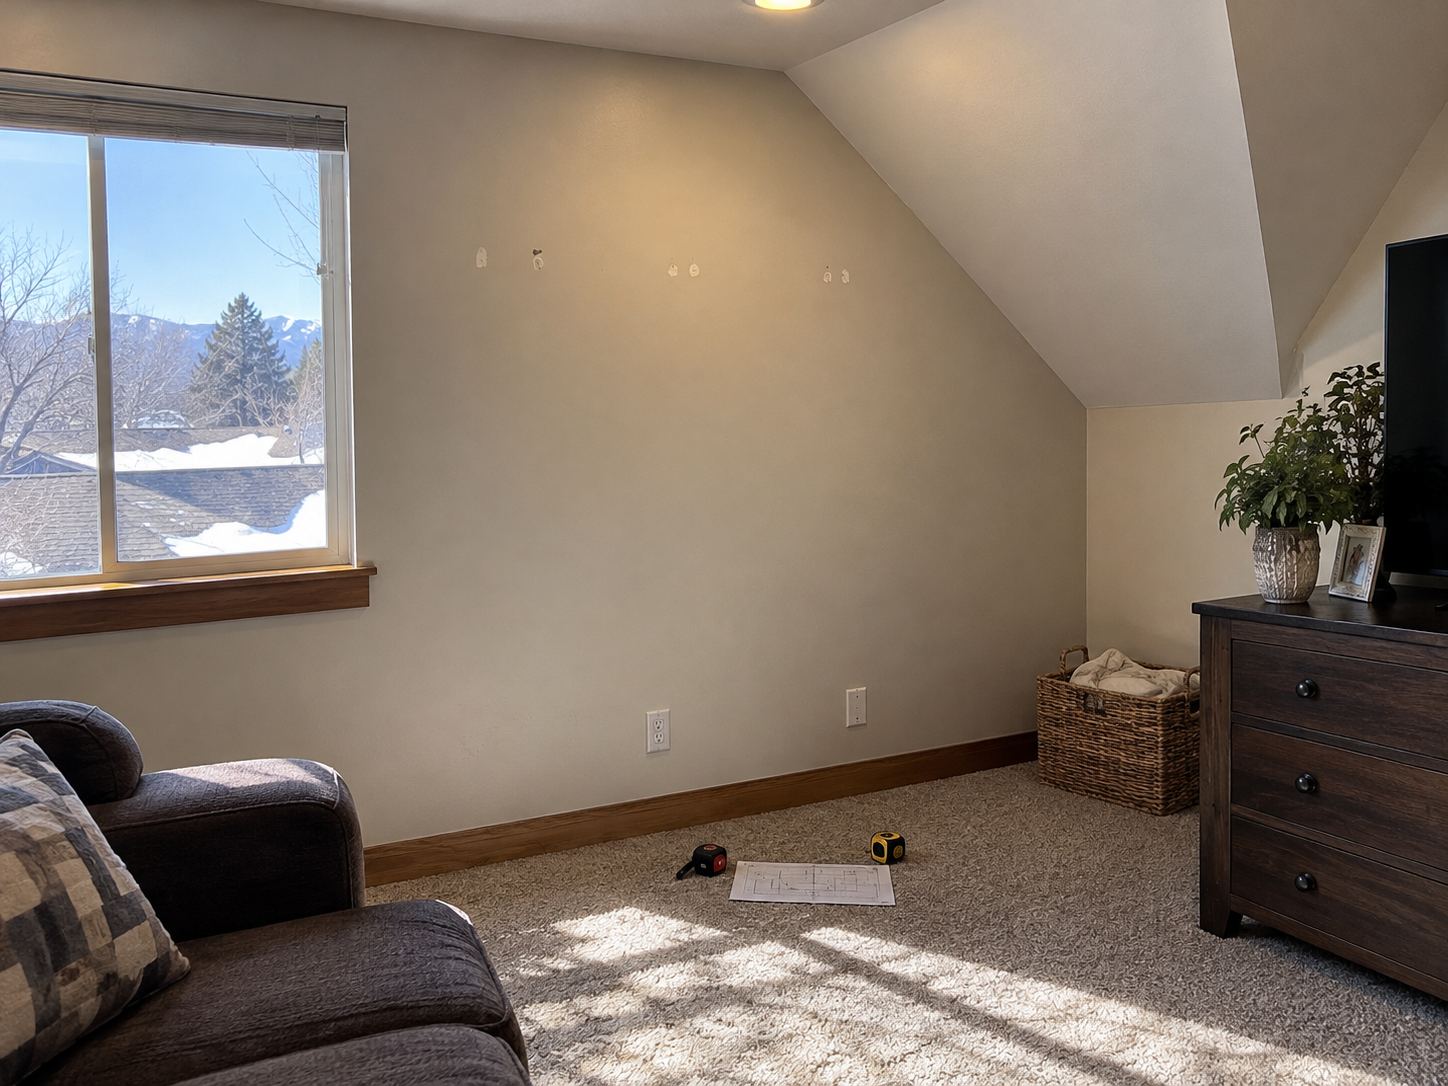
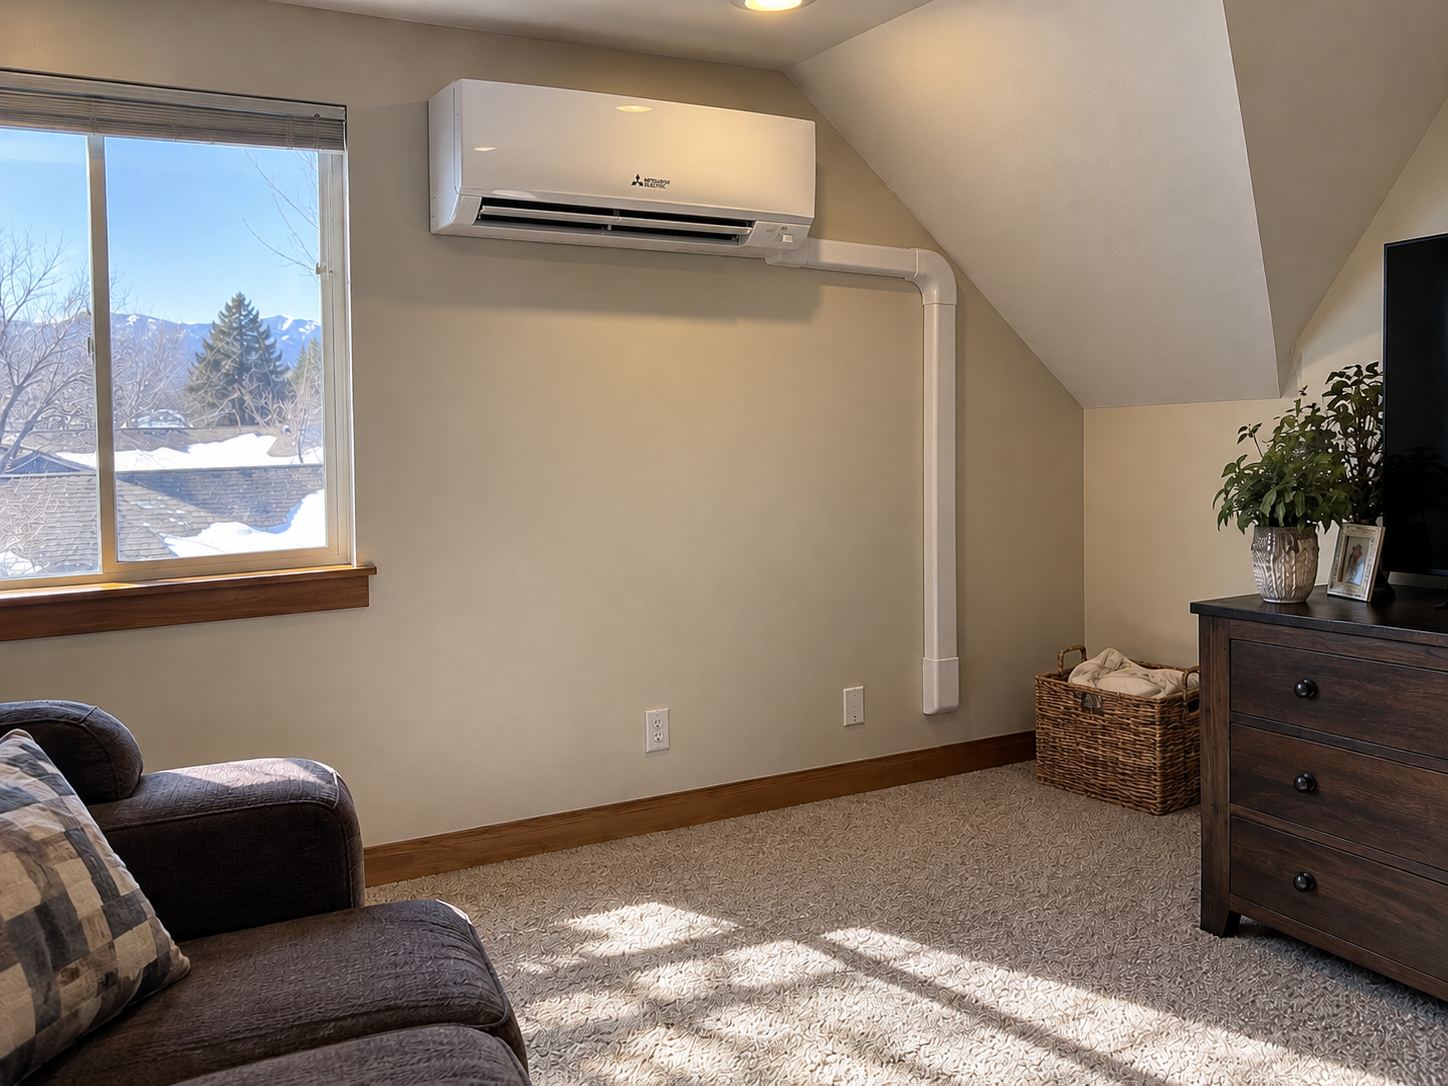
A West Valley City customer in a 2003-built home contacted us about adding cooling and heating capability to a bonus room above their garage. The space was finished but never properly connected to the home’s central HVAC system — supply ductwork had been roughed in but never balanced or properly returned, leaving the bonus room consistently 12–15°F hotter than the rest of the home in summer and 8–10°F colder in winter. The customer used the space as a home office that had become essentially unusable during summer heat.
This case study documents a single-zone ductless mini-split installation as the practical solution to a problem central HVAC couldn’t address without major ductwork rework.
Customer Situation
- Home: 2003-built two-story, approximately 2,400 sq ft main living area
- Bonus room: Approximately 380 sq ft above garage, finished but isolated from main HVAC system
- Existing equipment: Functional central furnace + AC serving main living area (not being modified)
- Symptom: Bonus room 12–15°F hotter than home in summer, 8–10°F colder in winter; unusable during summer
- Customer priorities: Make the bonus room comfortable year-round, reasonable cost, minimal disruption to main HVAC system
Initial Assessment
Why central HVAC extension wasn’t the answer:
We discussed central HVAC modifications with the customer before recommending mini-split:
- Adding the bonus room to the central system would require new dedicated supply duct runs through finished spaces
- The bonus room above the garage has different load characteristics (more exterior wall, more solar gain, less thermal mass) than other spaces — adding it to a central zone would cause comfort issues for other rooms
- Existing central equipment (3-ton AC, 80,000 BTU furnace) was already appropriately sized for the main living area; adding the bonus room load would push it past capacity in extreme weather
- Estimated cost of central HVAC modification: $4,500–$7,500 plus uncertain comfort outcome
Why mini-split was the right answer:
- Independent zone control — bonus room temperature managed independently from main home
- Dedicated equipment sized for the bonus room load specifically
- No modification to existing central HVAC system
- Heat pump operation provides both cooling and heating year-round
- Federal 25C tax credit on qualifying heat pump equipment
- Installation cost competitive with central HVAC modification
- Predictable comfort outcome
Load Calculation
On-site Manual J calculation for the bonus room:
- Conditioned area: 380 sq ft
- Insulation: R-13 walls (2×4 construction), R-30 attic floor below, R-38 cathedral ceiling above
- Windows: 32 sq ft, vinyl double-pane, west-facing (significant afternoon solar gain)
- Floor: Over uninsulated garage (cold transfer in winter)
- Infiltration: Estimated 4 ACH50 (older construction phase)
- Salt Lake design conditions: 96°F cooling, 14°F heating
Manual J results: – Cooling load: 8,400 BTU/h – Heating load: 11,200 BTU/h (heating governs due to garage floor heat loss)
Equipment Selection
Discussed three options with customer:
Option 1: Mitsubishi MSZ-GL12NA (12,000 BTU, 23.1 SEER2, 11.0 HSPF2) — $5,800 installed – Diamond Contractor pricing – 12,000 BTU capacity adequate for the load – Strong cold-weather heat pump performance – 12-year parts warranty (Diamond Contractor extended)
Option 2: Fujitsu 12RLS3H (12,000 BTU, 25.0 SEER2, 12.0 HSPF2) — $5,600 installed – Slightly higher efficiency – 10-year parts warranty – Comparable cold-weather performance
Option 3: LG Art Cool 12,000 BTU (12,000 BTU, 22 SEER2, 10.0 HSPF2) — $4,900 installed – Lower price point – Adequate efficiency – 10-year parts warranty
The customer selected Option 1 (Mitsubishi MSZ-GL12NA). Justified by: – Strongest cold-weather heat pump performance for the heating-governed load – Diamond Contractor warranty extension – Diamond Contractor installation expertise (we’re a Mitsubishi Diamond Contractor) – Federal 25C tax credit eligibility
Installation Day
Crew: Travis Hollings (lead installer), Cole Bennett (assistant)
Duration: 1 day, 8:00 AM to 4:30 PM
Equipment placement:
- Indoor unit: Wall-mounted on interior wall opposite west-facing windows, 7 ft above floor
- Outdoor unit: Side of garage at ground level on concrete pad we poured (8″ of compacted gravel base, 4″ 3,500 psi concrete pad with anchor mounting holes)
- Line set routing: Through 3″ diameter penetration in exterior wall, routed through unfinished garage space, line set cover for visible portion
Installation work:
- Outdoor pad preparation — gravel base, concrete pad with anchor pattern matching outdoor unit specifications
- Indoor unit mounting — wall bracket installed with anchors into studs, level verified
- Penetration cut — 3″ hole through wall framing avoiding insulation, fire-stop sealed after line set installation
- Line set installation — 1/4″ liquid, 3/8″ suction with factory-flared fittings; line set length 28 ft (factory pre-charged adequate for length per manufacturer specifications)
- Nitrogen pressure test — 500 psi for 15 minutes, no pressure drop
- Vacuum to 425 microns — held 20 minutes with stable reading
- Refrigerant release — factory charge released from outdoor unit per manufacturer procedure
- Electrical connection — dedicated 15-amp 240V circuit from main panel (customer had panel space available)
- Condensate drain — gravity drain through small-diameter line to exterior wall
- Wireless remote configuration — paired remote with indoor unit, configured operating modes
- Wi-Fi adapter installation — connected to customer’s Wi-Fi for Mitsubishi Kumo app control
Commissioning Measurements
After 20 minutes of cooling operation stabilization:
- Outdoor temperature: 88°F
- Indoor bonus room temperature: 75°F (setpoint 73°F)
- Suction pressure: 142 psi ✓ (manufacturer spec at conditions)
- Discharge pressure: 405 psi ✓
- Indoor unit air temperature differential: 19°F (target 18–22°F) ✓
- Outdoor compressor amp draw: 4.2 amps (nameplate 6 amps) ✓
- Indoor blower amp draw: 0.4 amps ✓
- Drain flow verified
Subsequent heating mode test (simulated by closing thermostat sensor to garage cold air for testing): – Heating output stable – Defrost cycle behavior nominal – Reverse valve operation confirmed
Final Cost and Rebate Filing
Customer’s cost: – Equipment and installation: $5,800 – Electrical work (dedicated 240V circuit): $450 (separate electrician customer hired) – Total project cost: $6,250
Rebates filed on customer’s behalf: – Federal 25C tax credit: $2,000 maximum (heat pump qualifying) – Rocky Mountain Power Wattsmart heat pump rebate: $400
Effective net cost after incentives: $3,850
Customer Outcome
Six-month follow-up after summer and into first heating season:
Summer performance: – Bonus room maintained 73°F setpoint reliably during 95°F+ days – Independent zone control means customer cools only when using the space – Quiet operation (28 dB at 6 ft, per Mitsubishi spec) doesn’t interfere with home office video calls
Winter performance: – Bonus room maintained 70°F setpoint through coldest days – Heat pump operation effective even at 12°F outdoor temperatures – No defrost cycle issues observed – Electric usage modest — approximately $35/month additional during heating season
Customer feedback: – Home office now usable year-round – Wi-Fi control allows pre-conditioning before workday – Significantly less expensive than central HVAC modification would have been – Visible line set cover acceptable aesthetically given the location (garage side wall)
What This Case Study Demonstrates
- Mini-split as appropriate solution for spaces that central HVAC can’t serve well — not every cooling/heating problem is solved by extending central systems
- Honest comparison of approaches — central HVAC modification vs. mini-split addition; recommended what genuinely worked better for the customer’s situation
- Load-appropriate equipment sizing — 12,000 BTU heat pump matched to the calculated 11,200 BTU heating load with appropriate cooling capacity
- Strong rebate qualifying — mini-split heat pumps qualify for Federal 25C up to $2,000 (vs. $600 furnace credit) plus utility rebates
- Documented commissioning — measurements verified equipment performance vs. manufacturer specifications
- Predictable outcome — independent zone control delivers comfort that central HVAC extension couldn’t promise
Considering a Similar Project?
If you have a bonus room, addition, garage conversion, or other space where central HVAC doesn’t provide adequate comfort, contact us or call (385) 250-0687 to discuss whether mini-split installation is appropriate for your situation.
- Phone: (385) 250-0687
- Address: 4454 Manhattan Ct, West Valley City, UT 84120
Aegis services in West Valley City
AC repair · AC installation · Furnace repair · Furnace installation · Heat pumps · Ductless mini-splits · Maintenance · Indoor air quality · Commercial HVAC · Emergency HVAC · All of West Valley City